
Create a Google Billing Account for Firebase
How to setup a google console billing account.
You need to have a Google Billing Account to enable the correct API metrics access for fireRun.io. The fireRun.io service makes a few API calls each day which do count against your limit. Since we only make a few calls, they will not have a material impact on your billing so there is no need to be concerned about being charged by Google for fireRun.io.
To create a new Cloud Billing account, do the following:
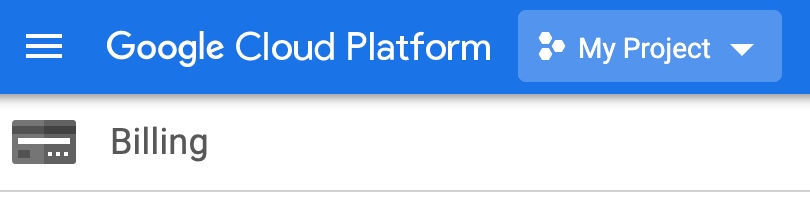
1. Sign in to the Manage billing accounts page in the Google Cloud Console.
2. Select your Firebase project in the upper right dropdown before proceeding.
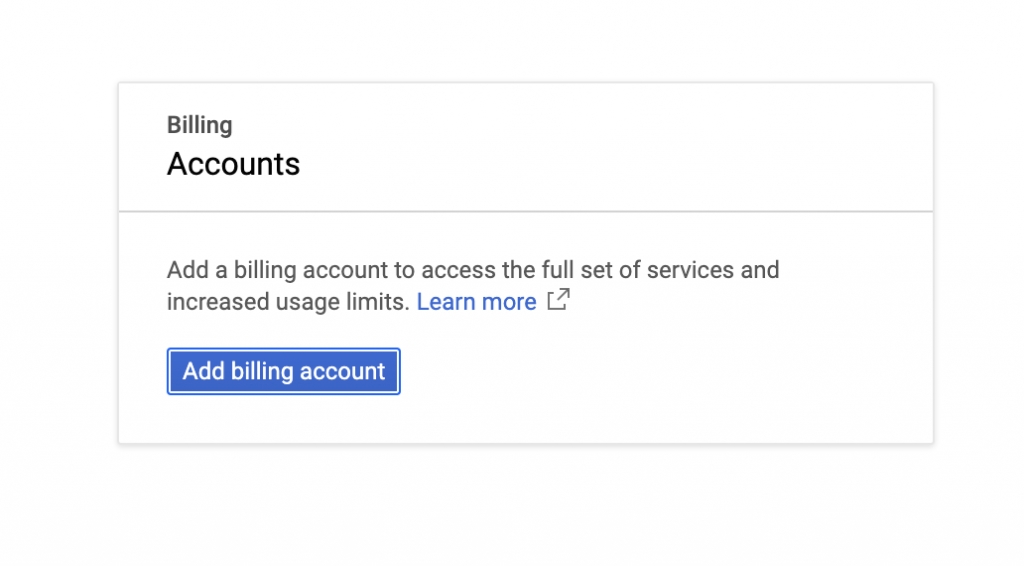
3. If you do not yet have a billing account, you should click Add billing account and fill out your details and payment method in the two step wizard.
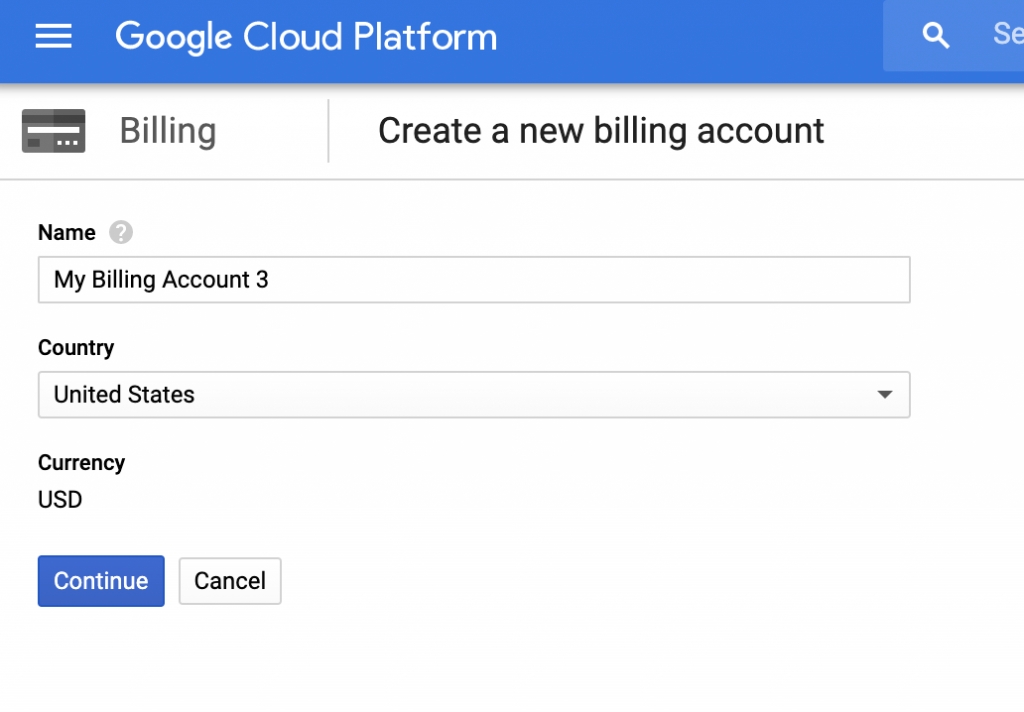
4. If you already have billing accounts set up, click Create account. Enter the Name of the Cloud Billing account.
Depending on your configuration, you will also need to select one of the following:
If you see an Organization drop-down, then you must also select an Organization before you can continue.
If you are prompted to select a Country, select the country that corresponds with your billing mailing address. The country you select will affect the payment options available in the next step. The currency for your Cloud Billing account is automatically assigned based on the country you select.
Click Continue.
5. Choose the Google payments profile that will be associated with this Cloud Billing account. Then click click Submit and enable billing.
To understand some of the more detailed options available to you, please refer to this Google Cloud documentation page.
Questions or Help
Last updated
Was this helpful?